Create a template Word 2013

Author: mety Labels:: , ,

Create a template

A template is simply a starting point. A Word (or any other Office) template is something that you create once that can be used over and over again. To create a template, you can start with a document you already created, one you downloaded, or a brand new one that you decide to customize in any number of ways.
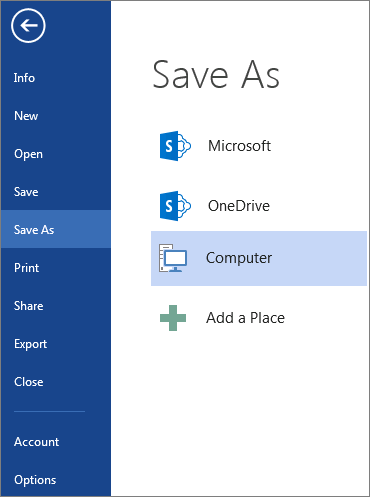
  1. To save a document as a template, click File > Save As.
  2. Double-click Computer.
The Save As window, showing the list of places where you can save a document
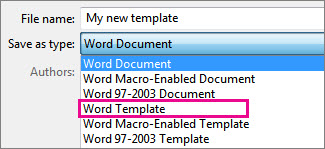
  1. Type a name for your template in the File name box.
  2. For a basic template, click Word Template in the Save as type list.
Save document as a template
If your document contains macros, click Word Macro-Enabled Template.
Word automatically goes to the Custom Office Templates folder.
  1. Click Save.
Tip    To change where Word automatically saves your templates, click File > Options > Save and type the folder and path you want to use in the Default personal templates location box. Word will save any new templates in that folder, and when you click File > New > Personal, Word will show you the templates in that folder.

Edit your template

To update your template, open the file, make the changes you want, and then save the template.
  1. Click File > Open.
  2. Double-click Computer.
  3. Browse to the Custom Office Templates folder that’s under My Documents.
  4. Click your template, and click Open.
  5. Make the changes you want, then save and close the template.

Use your template to make a new document

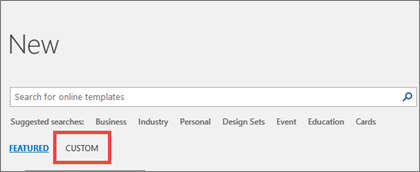
To start a new document based on your template, click File > New > Personal, and click your template.
Link to personal templates

Use your templates from earlier versions of Word

If you made templates in an earlier version of Word, you can still use them in Word 2013. The first step is to move them into the Custom Office Templates folder where Word can find them. To move your templates quickly, use the Fix it tool.


FixIt button indicating that an automated fix is available
Use a Fix it to migrate your custom templates for you
The Fix it fixes all Office programs at the same time. You don’t need to specify the template location in each Office program.
The Fix it doesn’t help you to set a new location, it only migrates to the Custom Office Templates folder under My Documents. If you want to set a new location, see the "I'll fix it myself" section below.

I’ll fix it myself

  1. In Windows 10 copy and paste the following in Cortana's Ask me anything box, and then press Enter: %appdata%\Microsoft\Templates\ (In earlier versions of Windows, click Start > Run, and paste that in the Open box).
  2. Copy the address that's displayed in the File Explorer address bar.
  3. In your Office program, click File > Options > Save, and then paste the address into the Default personal templates location box.
Make sure you do this for each Office program. After you’ve updated your template location, any new templates will be saved to this default location.

0 comments |

Create a new Office file using a template Word 2013

Author: mety Labels:: , ,

Create a new Office file using a template


Find or create the right template, and you’ll be saved the work of repeatedly recreating basic content and layout information. And, because Office saves your changes to the new file and not to the template, you can use that template for unlimited documents, presentations, or spreadsheets.
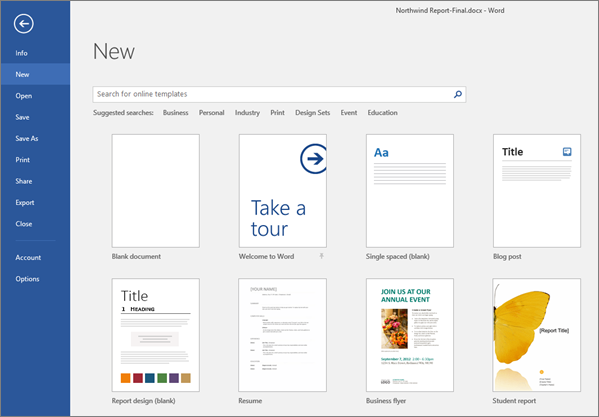
When you first start an Office app, like Word, Excel, PowerPoint, Visio, or Access you automatically see a list of templates. To see the list at any other time, click File > New. The following figure shows the Templates available for Word:
A list of available Word templates is shown.
Try more free templates from templates.office.com right from within your Office app. Simply search for templates where you see Search for online templates. For quick access to popular templates, click any of the keywords below the search box.
The search box for finding online Word templates is shown.
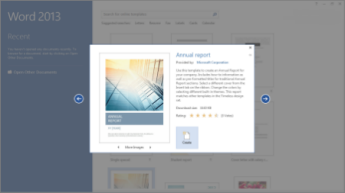
Once you find a template you like, double-click it to create your file based on that template. To take a closer look, click the thumbnail to see a large preview. Click the arrows on either side of the preview window to see related templates.
Template preview
If you frequently use a template, you can pin it so it’s always there when you start your Office app. Just click the pushpin icon that appears below the thumbnail in the list of templates.
Pin template
Pinned templates will never show a preview. You just double click the pinned template's thumbnail to quickly create a new file based on that template.

0 comments |

Basic tasks in Word 2013

Author: mety Labels:: ,

Basic tasks in Word 2013

Microsoft Word 2013 is a word-processing program designed to help you create professional-quality documents. Word helps you organize and write your documents more efficiently.
Your first step in creating a document in Word 2013 is to choose whether to start from a blank document or to let a template do much of the work for you. From then on, the basic steps in creating and sharing documents are the same. Powerful editing and reviewing tools help you work with others to make your document perfect.

Choose a template

It’s often easier to create a new document using a template instead of starting with a blank page. Word templates are ready to use with themes and styles. All you need to do is add your content.
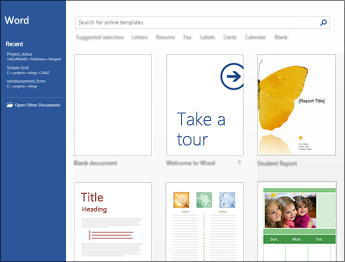
Each time you start Word 2013, you can choose a template from the gallery, click a category to see the templates it contains, or search for more templates online. (If you’d rather not use a template, just click the Blank document.)
Word start screen
For a closer look at any template, just click it to open a large preview.


Open a document

Every time you start Word, you’ll see a list of your most recently used documents in the left column. If the document you’re looking for isn’t there, click Open Other Documents.
Open other documents
If you’re already in Word, click File > Open and then browse to the file’s location.
When you open a document that was created in earlier versions of Word, you see Compatibility Mode in the title bar of the document window.

Save a document

To save a document for the first time, do the following:
  1. Click the File tab.
  2. Click Save As.
  3. Browse to the location where you’d like to save your document.
    Note    To save the document on your computer, choose a folder under Computer or click Browse. To save your document online, choose a location under Places or Add a Location. When your files are online, you can share, give feedback and work together on them in real time.
  4. Click Save.
    Note   Word automatically saves files in the .docx file format. To save your document in a format other than .docx, click the Save as type list, and then select the file format that you want.
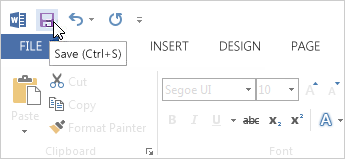
To save your document as you continue to work on it, click Save in the Quick Access Toolbar.
Save in the Quick Access Toolbar


Read documents

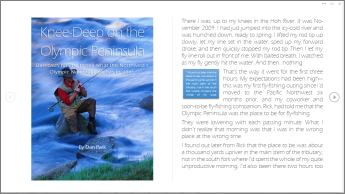
Open your document in Read Mode to hide most of the buttons and tools so you can get absorbed in your reading without distractions.
Read mode
  1. Open the document you want to read.
    Note    Some documents open in Read Mode automatically, such as protected documents or attachments.
  2. Click View > Read Mode.
  3. To move from page to page in a document, do one of the following:
    • Click the arrows on the left and right sides of the pages.
    • Press page down and page up or the spacebar and backspace on the keyboard. You can also use the arrow keys or the scroll wheel on your mouse.
    • If you’re on a touch device, swipe left or right with your finger.
      Tip    Click View > Edit Document to edit the document again.


Track changes

When you’re working on a document with other people or editing a document yourself, turn on Track Changes to see every change. Word marks all additions, deletions, moves, and formatting changes.
  1. Open the document to be reviewed.
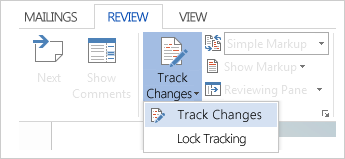
  2. Click Review and then on the Track Changes button, select Track Changes.
Track Changes

Print your document

All in one place, you can see how your document will look when printed, set your print options, and print the file.
Print in the Backstage view
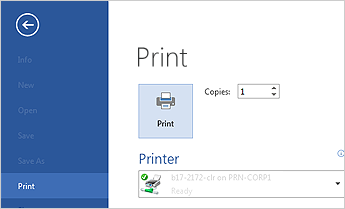
  1. Click the File tab and then click Print.
  2. Do the following:
    • Under Print, in the Copies box, enter the number of copies you want.
    • Under Printer, make sure the printer you want is selected.
    • Under Settings, the default print settings for your printer are selected for you. If you want to change a setting, just click the setting you want to change and then select a new setting.
  3. When you’re satisfied with the settings, click Print.

0 comments |

Make Bunting with Microsoft Word

Author: mety Labels::


1)  have the page as 'Landscape' rather than 'Portrait', because then you can fit a couple of flags on the page and you are viewing the images as they will actually look as bunting. It just helps with the visualising and design process. You can change the page orientation by going to 'Page Layout' and then 'Orientation'.


2) The first step, naturally, is to pick a shape by going to 'Insert' and then 'Shapes'. use the common triangle shape for the bunting (the triangle used comes under 'Flowchart: Merge' in Word 2007). Other shapes that I think would make pretty bunting are hearts, the rectangle shape or something which Word calls 'Flowchart: Manual Operation' and 'Flowchart: Off Page Connector'.


3) right click on the newly drawn shape to bring up the 'Format Autoshape' box and change the measurements under the 'Size' tab. While you have this box up, you can also go into the "Colors and Lines" tab and change the size, colour and style of the shape's outline, (this can also be done under the 'Format menu which I'll come onto in a second). Click OK once you are happy. 


4) Your next job is to fill the shape with pretty colours or patterns. To do this, select 'Format' from the menu bar and go to 'Shape Fill'. You can fill the shape with a solid colour, a gradient colour, picture, texture or pattern. For the latter two, there are a variety of textures and patterns which come with MS Word, but you can also use your own which is what I've done in the image below.


5) To add your own background to the bunting go to 'Shape Fill', then 'Texture' and then select 'More Textures'. This is where you can upload your own image by clicking on 'Other Texture' and locating the file your want on your computer. After this step you have a range of other effects you can add to your bunting. Here are a couple of them.

Add Clip Art


If you are talented with Photoshop then that's great! But fortunately for the rest of us, Word comes with a lot of free clip art images. Here I have decided to add an ice cream image to my bunting. This is how to add clip art in Microsoft Word. 


1) Go to 'Insert' on the menu bar and look for 'Clip Art'. Click on this to bring up a search box, type in what you are looking for and then scroll through the images to find something you like.


2) You've probably just found that your clip art is stuck behind your banner and is resisting being moved around. Go to 'Format' on the menu bar, click on 'Text Wrapping' and choose 'In Front of Text'.


3) You will now be able to re-size the clip art more easily and position it where you want it.

Add Letters or Text  

If you are making bunting for a celebration then a useful trick is adding numbers of letters, so you can spell out messages (e.g, "Happy Birthday"), names, ages, etc. I find the simplest way to do this is with the Word Art function.


1) Go to 'Insert' on the menu bar and then look for 'Word Art'. Choose any style of word art - you'll be changing that in a second, so it doesn't matter at this stage which one you use.


2) Type in your letter, number or word and pick your font. 


3) Your text will be hiding behind your banner, so go to 'Format' and select 'In Front of Text' under the  'Text Wrapping' function. At the moment it is still looking a bit uninspiring, so let's jazz up the text a bit.


4) You can change the appearance of your text under the 'Format' tab on the menu bar. It is actually very similar to the steps you took when formatting your shape in the first part of this tutorial. You can change the colour, pattern or texture under 'Shape Fill' and use a different colour for the 'Shape Outline'. There is also the 'Change Shape' function, which will add effects to the text. I just clicked on the straight line under 'Follow Path' because I didn't want any fancy effects.

5) Finally, click and drag the little squares around the selected text to increase/decrease the size until you are happy with it. You could also right click on the shape and change the measurements under 'Format WordArt'.

Layering Different Elements


Now I'm going to run through a quick example that combines everything you have just learned. 


1) You can layer shapes on top of each other. 


2) Then add some text on top of that...


3) ... and to round off this bunting flag I've added some clip art. If you find some clip art which is perfect but it doesn't quite fit in with your colour scheme, you can re-colour it. On the 'Format' menu find 'Recolor' and then scroll through your options until you find a colour you like. 


4) The last thing I recommend doing is grouping all the different elements together. This means that you can move the bunting flag around the page as one object, rather than having to re-position each element individually. To do this, click on each object while holding down the 'alt' key. Once everything is selected, right click on your bunting and select 'Grouping' followed by 'Group'. 
0 comments |

Mac OS X Mountain Lion iTunes and Entertainment

Author: mety Labels::


Mac OS X Mountain Lion

iTunes and Entertainment

iTunes

itunes icon
The desktop version of iTunes comes pre-installed on every Mac and is also available for Windows. You can use it to play media (including music, TV shows, movies, podcasts, and more), and also to download content from the iTunes Store. You can even sync the app across devices, so you can access your media library anytime.
Most of what's available in the iTunes Store costs money, but you'll still find thousands of items that can be downloaded for free. iTunes is also pretty accommodating when it comes to certain types of paid content. For example, you can purchase a single song instead of an entire album, or rent a movie instead of buying it.
iTunes is also compatible with AirPlay and Apple TV, two products that, when used together, let you stream media from one device to another. To learn more, visit Apple's introduction to AirPlay and Apple TV, or go to page 8 of this lesson.
Click the arrows to view iTunes on each device.
  • slide 1
As you may have gathered, the mobile version of iTunes is a bit different from the desktop version. Most importantly, it has a different way of playing content. To learn more, visit the iTunes page in our iPad tutorial.

Have More Than One Apple Device?

arrows
Enable automatic downloads to sync your music and e-book purchases across devices. To find out if you already have it enabled, visit your device's iTunes Store settings. Remember, you have to configure each device separately.
TV shows, movies, and music videos can't be synced automatically, but you can re-download them to any of your devices using iTunes in the Cloud. Just look for your purchases in the appropriate area (for example, TV Showsor Movies), and you can download them again. This option is available as long as you use the same Apple ID on each device.

Getting to Know iTunes

As you already know, the iTunes app is different on each device—but there are many similarities when it comes to basic tools and features. Use the interactive below to learn how to perform several common tasks in the Macversion.

To watch or listen to iTunes content on your mobile device, you'll use the Music or Videos app instead. To learn more about these apps, visit the Media and Entertainment lesson in our iPad tutorial.

Using the iTunes Store

With the iTunes Store, you can buy music, movies, TV shows, mobile apps, and e-books, and they will be downloaded to your computer automatically. In addition to buying things, you can download free college lecture videos from iTunes U, and you can subscribe to free audio or video podcasts. To learn your way around, use the interactive below.

Purchasing Media

Once you've found the item that you want to buy, you can click to view all of your purchase options. For example, if you click an album, you'll have the option of buying the entire album, or just individual songs. You can even preview a song using the play button that appears when you hover over the song. (You can also preview videos this way.)
Purchasing an albumPurchasing an album
For movies and TV shows, you'll usually have the option of buying High Definition (HD) or Standard Definition (SD). High Definition is higher quality, but it's more expensive, and it takes up more space on your hard drive.
Alternatively, you can rent movies instead of buying them. When you rent a movie in iTunes, it starts downloading right away—but you don't have to watch it immediately. Instead, you can wait until it's convenient. You have 30 days to redeem your rental, and 24 hours to finish watching once you start playing it.
Purchasing a moviePurchasing a movie

Importing Music

When you purchase music in the iTunes Store, it will automatically be imported into your library. However, you may have some CDs that you want to import as well (also known as "ripping"). You may also have mp3s or other audio files that were created by a program other than iTunes. To listen to these items, you'll need to import them to your iTunes library manually.

To Change Your Import Settings:

If this is your first time importing a CD to iTunes, you may want to check your import settings first. These settings control what happens when you insert a CD into your computer's CD-ROM drive.
  1. At the top of the screen, click iTunes (or Edit if you're using the Windows version) and select Preferences.
    Going to the iTunes preferencesGoing to the iTunes preferences
  2. Click the drop-down box next to When you insert a CD, then select the desired option. If you're importing lots of CDs, you should select one of the bottom three options.
    Selecting your import settingsSelecting your import settings
  3. If you want to change the compression settings of your imported music, click Import Settings. Generally, you should select the AAC Encoder or the MP3 Encoder, as they will help you save space on your hard drive.
    Changing the compression settingsChanging the compression settings

To Import a CD:

  1. Insert a CD into your computer's CD-ROM drive.
  2. Depending on your import settings, the CD may begin importing automatically. If it doesn't, click Import CD in the top corner of the window. It may take several minutes to import your CD.
    Importing a CDImporting a CD
  3. To eject the CD, click the Eject button in iTunes, or press the Eject key on your keyboard.
    Ejecting a CDEjecting a CD

To Add an Audio File:

  1. Click File and select Add to Library.
    Adding to libraryAdding to library
  2. Select the files that you want to import, and then click Open. The files will be added to your Library.
    Importing mp3s to the iTunes LibraryImporting mp3s to the iTunes Library
To select more than one file at a time, hold the Shift key on your keyboard while you click. This will select all the files at once.

Importing Videos

Just like your purchased music, all of your purchased TV shows and movies will be added to your iTunes libraryautomatically. For other videos, your options are much more limited. iTunes doesn't allow you to rip DVDs or Blu-rays, so you won't be able to import movies or TV shows from your home collection. It's not compatible with all video formats either; you can only import video files that end in .mov, .m4v, or .mp4.

To Add a Video File:

  1. Click File and select Add to Library.
    Adding to libraryAdding to library
  2. Select the files you want to import, then click Open. If the files are compatible with iTunes, they'll be added to your library.
    Importing a video to the iTunes LibraryImporting a video to the iTunes Library
When you add a video file to iTunes, it'll appear under Movies (even if it's a TV show). However, your purchased TV shows will always appear in the TV Shows library.

Creating Playlists

iTunes allows you to group the songs in your library into playlists, so you can have different mixes for different situations (such as exercising or hanging out with friends). If you want, you can also create playlists of videos.

To Create a Playlist:

  1. Navigate to Playlists in the iTunes window.
    Navigating to playlistsNavigating to playlists
  2. In the bottom-left corner, click the + button, then choose New Playlist from the menu. This will create an empty, untitled playlist in the right pane.
    Creating a new playlistCreating a new playlist
  3. Type a name for your playlist, then press Enter on your keyboard.
    Naming your playlistNaming your playlist
  4. Drag and drop the songs, albums, or artists that you want from your library into your playlist.
    Adding files to a playlistAdding files to a playlist
  5. Click Done to save and close the playlist.
    Saving your playlistSaving your playlist
You can also create a playlist by selecting one or more files in your library and navigating to File > New > Playlist from Selection.

More Apps for Media and Entertainment

Game Center

Game Center icon 
Game Center is a built-in app that lets you play games on your device, with a unique social networking twist. In other words, you can play by yourself, but the real benefit comes from interacting or competing with other players. For example, you can upload your contacts list to compare scores with your friends, or let Game Center match you with other players based on your skill level.
The Game Center appThe Game Center app
Game Center is available for the iPad, iPhone, iPod Touch, and Mac (OS X Mountain Lion only).

GarageBand

garageband icon
GarageBand is a great app for musicians and beginners alike. You can use it to write music andrecord songs on your computer. You can even plug in your own instrument, and compose or record music in real time. All you need is an electric guitar, or a keyboard with a USB connection. If you don't have an instrument, you can use the on-screen controls.

iMovie

imovie icon
iMovie is a built-in app that lets you organize, watch, and edit your own video projects. With tons of features that are fun and easy to use, you can create high quality videos (including home movies, slideshows, short films, and more), no matter what your skill level. iMovie even comes with templatesthat can help you incorporate Hollywood-style graphics, transitions, and special effects.

Mobile Apps for Your iTunes Content

There are several other mobile apps (in addition to Music and Videos) that you can use to access your iTunes content across devices. As you can see, each app is designed for something specific. All of these apps can be downloaded for free in the App Store.
  • ibooks icon
     The iBooks app gives you access to over 20,000 books, basically turning your mobile device into an e-reader. There's something for everyone, from novels, to cookbooks, to illustrated children's books—even enhanced titles that come with audio or video. You can also browse by title, author, genre, and current bestseller lists.
  • iTunes U icon
     The iTunes U mobile app allows you to watch free lecture videos from various colleges, universities, and businesses. It works a lot like a podcast: If you subscribe to a specific course, the iTunes U app will download more and more lectures as you make your way through the course.
  • podcasts icon
     The Podcasts mobile app can be used to download and listen to podcasts on your mobile device. You can download one episode at a time, or subscribe to make sure new episodes are downloaded automatically.

    AirPlay and Apple TV

    apple tv logo
    airplay icon
    AirPlay and Apple TV are two of the latest technologies from Apple. They give you new ways to experience media that you would normally watch or listen to on your other devices. For example, you can stream music wirelessly from your iPad to AirPlay-enabled speakers. You can also watch movies that you downloaded from iTunes on your own TV (again, wirelessly) using the Apple TV device.
    To get started with AirPlay and/or Apple TV, check out the information on Apple's website, or visit your local Apple store. It may help to think of these options as yet another pair of devices, in addition to the iPad, iPhone, iPod Touch, and Mac. They're all designed to work together, so you can access to your media anytime.
    Apple TVApple TV

0 comments |

Labels

Powered by Blogger.

I made these pages for me and my friends to help solving the problem we face regarding Computer & internet, if anyone wants me to answer a question or find out about some information please send me email and I will try to reply.*P.S. some of the article I wrote and the other I found on the internet I posted them in sprit of learning and shearing, please forgive me if you found something you don’t want to be in my blog, email me and I will delete them. Thank you for your interest in my pages.امل نجم Amal Nagm

banner 1 banner 2