Create a template Word 2013

Author: mety Labels:: , ,

Create a template

A template is simply a starting point. A Word (or any other Office) template is something that you create once that can be used over and over again. To create a template, you can start with a document you already created, one you downloaded, or a brand new one that you decide to customize in any number of ways.
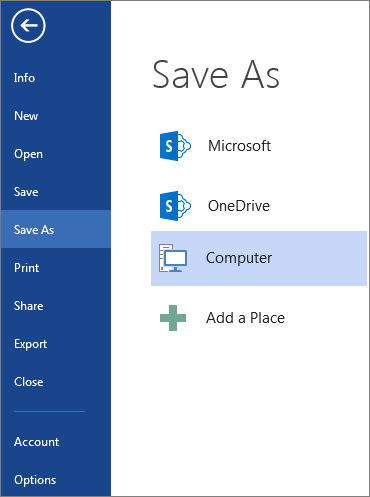
  1. To save a document as a template, click File > Save As.
  2. Double-click Computer.
The Save As window, showing the list of places where you can save a document
  1. Type a name for your template in the File name box.
  2. For a basic template, click Word Template in the Save as type list.
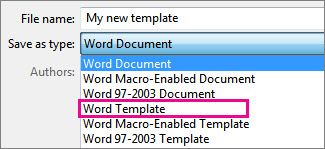
Save document as a template
If your document contains macros, click Word Macro-Enabled Template.
Word automatically goes to the Custom Office Templates folder.
  1. Click Save.
Tip    To change where Word automatically saves your templates, click File > Options > Save and type the folder and path you want to use in the Default personal templates location box. Word will save any new templates in that folder, and when you click File > New > Personal, Word will show you the templates in that folder.

Edit your template

To update your template, open the file, make the changes you want, and then save the template.
  1. Click File > Open.
  2. Double-click Computer.
  3. Browse to the Custom Office Templates folder that’s under My Documents.
  4. Click your template, and click Open.
  5. Make the changes you want, then save and close the template.

Use your template to make a new document

To start a new document based on your template, click File > New > Personal, and click your template.
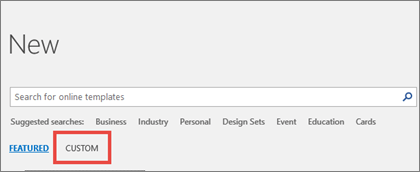
Link to personal templates

Use your templates from earlier versions of Word

If you made templates in an earlier version of Word, you can still use them in Word 2013. The first step is to move them into the Custom Office Templates folder where Word can find them. To move your templates quickly, use the Fix it tool.


FixIt button indicating that an automated fix is available
Use a Fix it to migrate your custom templates for you
The Fix it fixes all Office programs at the same time. You don’t need to specify the template location in each Office program.
The Fix it doesn’t help you to set a new location, it only migrates to the Custom Office Templates folder under My Documents. If you want to set a new location, see the "I'll fix it myself" section below.

I’ll fix it myself

  1. In Windows 10 copy and paste the following in Cortana's Ask me anything box, and then press Enter: %appdata%\Microsoft\Templates\ (In earlier versions of Windows, click Start > Run, and paste that in the Open box).
  2. Copy the address that's displayed in the File Explorer address bar.
  3. In your Office program, click File > Options > Save, and then paste the address into the Default personal templates location box.
Make sure you do this for each Office program. After you’ve updated your template location, any new templates will be saved to this default location.

0 comments |

Create a new Office file using a template Word 2013

Author: mety Labels:: , ,

Create a new Office file using a template


Find or create the right template, and you’ll be saved the work of repeatedly recreating basic content and layout information. And, because Office saves your changes to the new file and not to the template, you can use that template for unlimited documents, presentations, or spreadsheets.
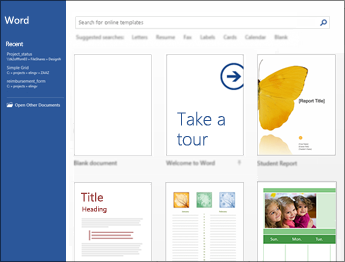
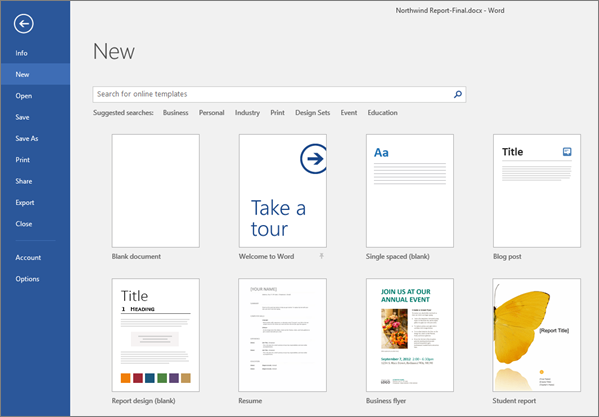
When you first start an Office app, like Word, Excel, PowerPoint, Visio, or Access you automatically see a list of templates. To see the list at any other time, click File > New. The following figure shows the Templates available for Word:
A list of available Word templates is shown.
Try more free templates from templates.office.com right from within your Office app. Simply search for templates where you see Search for online templates. For quick access to popular templates, click any of the keywords below the search box.
The search box for finding online Word templates is shown.
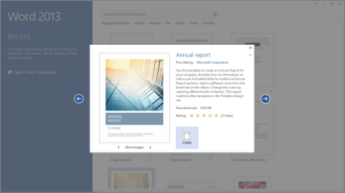
Once you find a template you like, double-click it to create your file based on that template. To take a closer look, click the thumbnail to see a large preview. Click the arrows on either side of the preview window to see related templates.
Template preview
If you frequently use a template, you can pin it so it’s always there when you start your Office app. Just click the pushpin icon that appears below the thumbnail in the list of templates.
Pin template
Pinned templates will never show a preview. You just double click the pinned template's thumbnail to quickly create a new file based on that template.

0 comments |

Basic tasks in Word 2013

Author: mety Labels:: ,

Basic tasks in Word 2013

Microsoft Word 2013 is a word-processing program designed to help you create professional-quality documents. Word helps you organize and write your documents more efficiently.
Your first step in creating a document in Word 2013 is to choose whether to start from a blank document or to let a template do much of the work for you. From then on, the basic steps in creating and sharing documents are the same. Powerful editing and reviewing tools help you work with others to make your document perfect.

Choose a template

It’s often easier to create a new document using a template instead of starting with a blank page. Word templates are ready to use with themes and styles. All you need to do is add your content.
Each time you start Word 2013, you can choose a template from the gallery, click a category to see the templates it contains, or search for more templates online. (If you’d rather not use a template, just click the Blank document.)
Word start screen
For a closer look at any template, just click it to open a large preview.


Open a document

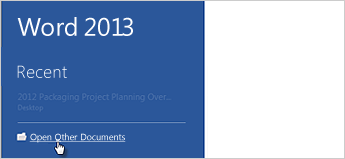
Every time you start Word, you’ll see a list of your most recently used documents in the left column. If the document you’re looking for isn’t there, click Open Other Documents.
Open other documents
If you’re already in Word, click File > Open and then browse to the file’s location.
When you open a document that was created in earlier versions of Word, you see Compatibility Mode in the title bar of the document window.

Save a document

To save a document for the first time, do the following:
  1. Click the File tab.
  2. Click Save As.
  3. Browse to the location where you’d like to save your document.
    Note    To save the document on your computer, choose a folder under Computer or click Browse. To save your document online, choose a location under Places or Add a Location. When your files are online, you can share, give feedback and work together on them in real time.
  4. Click Save.
    Note   Word automatically saves files in the .docx file format. To save your document in a format other than .docx, click the Save as type list, and then select the file format that you want.
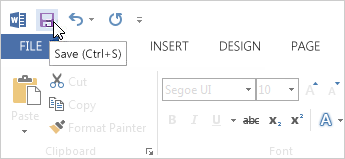
To save your document as you continue to work on it, click Save in the Quick Access Toolbar.
Save in the Quick Access Toolbar


Read documents

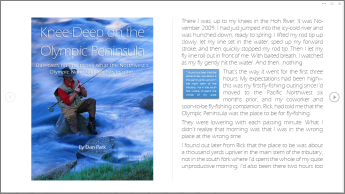
Open your document in Read Mode to hide most of the buttons and tools so you can get absorbed in your reading without distractions.
Read mode
  1. Open the document you want to read.
    Note    Some documents open in Read Mode automatically, such as protected documents or attachments.
  2. Click View > Read Mode.
  3. To move from page to page in a document, do one of the following:
    • Click the arrows on the left and right sides of the pages.
    • Press page down and page up or the spacebar and backspace on the keyboard. You can also use the arrow keys or the scroll wheel on your mouse.
    • If you’re on a touch device, swipe left or right with your finger.
      Tip    Click View > Edit Document to edit the document again.


Track changes

When you’re working on a document with other people or editing a document yourself, turn on Track Changes to see every change. Word marks all additions, deletions, moves, and formatting changes.
  1. Open the document to be reviewed.
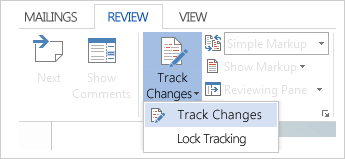
  2. Click Review and then on the Track Changes button, select Track Changes.
Track Changes

Print your document

All in one place, you can see how your document will look when printed, set your print options, and print the file.
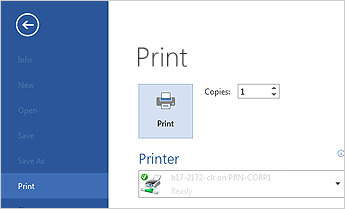
Print in the Backstage view
  1. Click the File tab and then click Print.
  2. Do the following:
    • Under Print, in the Copies box, enter the number of copies you want.
    • Under Printer, make sure the printer you want is selected.
    • Under Settings, the default print settings for your printer are selected for you. If you want to change a setting, just click the setting you want to change and then select a new setting.
  3. When you’re satisfied with the settings, click Print.

0 comments |

Labels

Powered by Blogger.

I made these pages for me and my friends to help solving the problem we face regarding Computer & internet, if anyone wants me to answer a question or find out about some information please send me email and I will try to reply.*P.S. some of the article I wrote and the other I found on the internet I posted them in sprit of learning and shearing, please forgive me if you found something you don’t want to be in my blog, email me and I will delete them. Thank you for your interest in my pages.امل نجم Amal Nagm

banner 1 banner 2